How to Create & Upload Your Selfie
Step 1 - Choose your Selfie Image
You can either send us a photo or a Bitmoji / digital avatar.
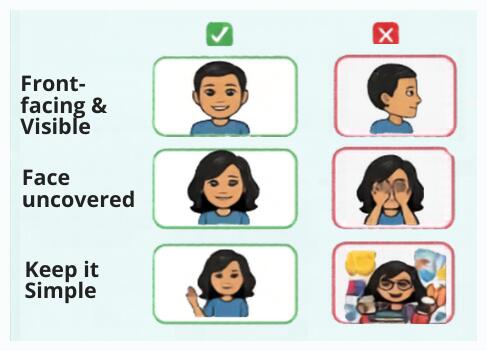 Here’s some tips for the best results:
- Choose a front-facing pose where your face is clearly visible, as side-on or turned poses can lose detail
- Avoid poses where hands, hats or props cover your face
- Keep it simple; avoid poses with busy backgrounds or multiple characters
- Don't worry about glasses; they look great on a stamp!
- Go for the image where your face fills as much of the frame as possible
- Ensure image files/photos are high resolution/quality
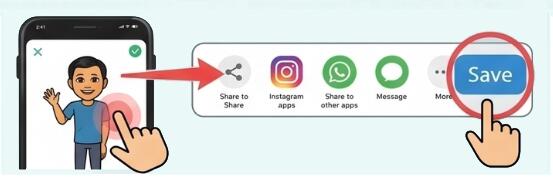 If you are using a Bitmoji, you will need to save it via the Bitmoji app. Within the app, create or update your avatar. Tap your chosen sticker and then scroll along the apps until you can choose ‘save’ (it is usually the last option!). Tap Save, and your Bitmoji will be saved to your Phone Gallery, where you can now upload it to the Selfie Stamp product page.
Step 2 - Upload on this product page
Upload your image using the button on this product page. Ensure you've selected the ink colour, stamp type/image size (review the ‘Options’ tab for more details) and added any top and/or bottom text required.
What Happens Next?
We’ll convert your image into a black and white illustration for stamps, or colour for stickers and badges.
If you’ve sent us a photo, we'll send you a digital proof to approve before we produce anything, so you can see exactly how it will look before we go ahead. Please make sure that your email address is correct, and you check your junk folder for your proof. The quicker we receive your approval, the quicker we can ship your order!
Please note that as part of the conversion to black and white, some very minor variations from your original image may occur, such as slight simplification of fine detail or subtle shading differences. This is a normal part of the process and is what gives your stamp its clean, bold finish.